
 |
| Nissan R32 Skyline evaporator removal and refresh project *AMENDED |
I want to thank Sean Kirby for making the first removal video but I wanted to expand on my own experience so I made a video as well as the rebuild results.Please go and watch his video here to understand any references I’ve made
https://www.youtube.com/watch?v=vh1IA…
Second, thank Eric Hermansen for confirming the parts needed to get this project going.
Parts I used for this project were the following.. you can substitute parts if available locally.AC Dryer –
https://www.amazon.com/gp/product/B00…
Expansion Valve – https://www.rockauto.com/en/moreinfo….
Butyl Tape – https://www.amazon.com/gp/product/B00…
Foam padding (sides) – https://www.amazon.com/gp/product/B07…
Exterior box foam – https://www.homedepot.com/p/M-D-Build…AC Flush kit (you will need to have access to an air compressor) –
https://www.amazon.com/gp/product/B07…
Cleaning solution – https://www.amazon.com/gp/product/B00…As for the vacuuming out the lines to create pressure and adding compressor oil and freon you will need to take it to a shop to do it for you, rent the stuff from your local auto parts store (it’s “free”, they just put a hold on your CC), or purchase the vacuum and AC gauges.
AMENDED – I found that the evaporator was not easily flushable with the expansion valve installed. I decided to do it right and pulled the evap box back out and removed the butyl tape and disconnected the expansion valve. I was able to flush the evap core and so much junk came out. I highly recommended flushing it off the car.

Now retrieving an image set.
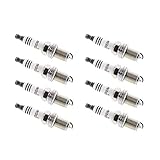
NGK Iridium IX Spark Plug LFR5AIX-11 (8 Pack) for NISSAN TITAN SE 2004-2008 5.6L/5552cc
(as of July 14, 2026 05:22 GMT +00:00 – More infoProduct prices and availability are accurate as of the date/time indicated and are subject to change. Any price and availability information displayed on [relevant Amazon Site(s), as applicable] at the time of purchase will apply to the purchase of this product.)



OYEAUTO 93501 Iridium Spark Plugs LKAR7BIX11S 6 Pack Compatible with Nissan 370Z Maxima Murano Pathfinder Quest GT-R Altima 2001-2024 & Infiniti G37 QX60 Q60 2008-2024 & Acura MDX TLX 2017-2024 V6
(as of August 25, 2026 10:17 GMT +00:00 – More infoProduct prices and availability are accurate as of the date/time indicated and are subject to change. Any price and availability information displayed on [relevant Amazon Site(s), as applicable] at the time of purchase will apply to the purchase of this product.)


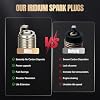
SYKRSS 6240 Iridium Spark Plugs 8 Pack Compatible with Nissan Armada Titan Pathfinder Armada 2004-2006 Compatible with INFINITI QX56 M45 FX45 Q45 2002-2010 4.5L 5.6L V8 Engine for PLFR5A-11 Spark Plug
(as of August 25, 2026 08:46 GMT +00:00 – More infoProduct prices and availability are accurate as of the date/time indicated and are subject to change. Any price and availability information displayed on [relevant Amazon Site(s), as applicable] at the time of purchase will apply to the purchase of this product.)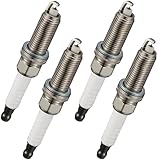


BDFHYK LKAR6AIX-11 Iridium Spark Plugs Compatible with Chevy for Nissan 2007-2013 Altima 2008-2013 Rogue 2007-2012 Sentra 2013-2021 NV200 1.6L 1.8L 2.0L 2.5L L4 Engine Replacement for XP5684, Set of 4
(as of August 25, 2026 08:46 GMT +00:00 – More infoProduct prices and availability are accurate as of the date/time indicated and are subject to change. Any price and availability information displayed on [relevant Amazon Site(s), as applicable] at the time of purchase will apply to the purchase of this product.)![[Vehicle Fitment-1]: This automotive replacement spark plugs Compatible with INFINITI 2009 2010 2011 2012 2013 FX50 V8 5.0L, 2011 2012 2013 M56 V8 5.6L, 2014 2015 2016 2017 2018 2019 Q70 V8 5.6L, 2015 2016 2017 2018 2019 Q70L V8 5.6L, 2011 2012 2013 ...](https://m.media-amazon.com/images/I/51a4vf0j0NL._SL160_.jpg)


Iridium Spark Plugs 8 Pack 93501 LKAR7BIX-11S Compatible with Nissan Armada NV2500 NV3500 TITAN INFINITI FX50 M56 Q70 Q70L QX56 QX70 QX80 V8 5.0L / 5.6L
(as of August 25, 2026 09:18 GMT +00:00 – More infoProduct prices and availability are accurate as of the date/time indicated and are subject to change. Any price and availability information displayed on [relevant Amazon Site(s), as applicable] at the time of purchase will apply to the purchase of this product.)



BDFHYK 93501 Iridium Spark Plugs Compatible with Nissan TITAN Altima Armada NV2500 NV3500, Compatible with INFINITI QX56 QX60 QX80 M56,CX-3 Replacement for LKAR7BIX11S Set of 8
(as of August 25, 2026 09:18 GMT +00:00 – More infoProduct prices and availability are accurate as of the date/time indicated and are subject to change. Any price and availability information displayed on [relevant Amazon Site(s), as applicable] at the time of purchase will apply to the purchase of this product.)
Leave a Reply